|
|
|
 |
|
|
 |
|
|
|
|
|
|
Microorganisms, Cells, DNA, and the Genetic Code
Miller Heights Elementary
School, Academic Year 2011-2012
Grade 4 (Ms. Walker's Class) |
|
|
|
|
| |
|
|
|
Ms. Walker and Dr. DeLeo ran a special set of programs this year for our class. Ms. Walker is an expert on the science of foods, and she wanted to bring in more aspects of science, particularly those related to microscopic sizes, like cells and bacteria. So she and Dr. DeLeo developed a new set of programs. In additional to having us run science experiments, Ms. Walker and Dr. DeLeo told the class that the overall program itself was an experiment since some of the activities were even new for them. But it was carefully planned and it was great. Here is the story of this program. |
|
|
|
| |
|
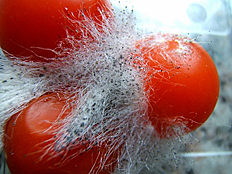
In the first part of the program, we watched something called mold grow on food. But first, some background: Life is classified into Kingdoms, the most familiar being the Plant Kingdom and the Animal Kingdom. However, there are also others, including Bacteria and Fungi. Yeasts, molds, and even mushrooms are members of the Fungi Kingdom. The photo on the right shows mold growing on a tomato.
(from: http://en.wikipedia.org/wiki/File:Schimmel-op-tomaat1079.jpg) |
|
|
|
|
|
|
|
Mold grows from microscopic mold spores. Mold spores are on our skin and all around us. However, they can really grow out of control under certain conditions.
|
|
|
|
| |
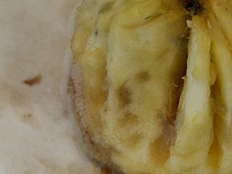
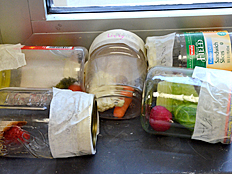
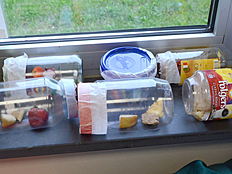
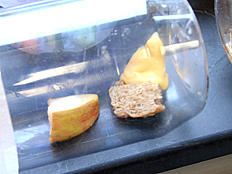
| In our first activity, each of us created these mold-growing conditions by constructing a mold terrarium. A mold terrarium is an enclosure, which can be as simple as a ziploc plastic bag or soda bottle containing a piece fruit or bread. We observed mold growth on a daily basis. Here are some photos. |
|
|
|
|
|
|
|
|
|
|
|
We learned that microscopic organisms can be good for you (even necessary) or bad for you. For example, moldy fruit or bread should be thrown away, and the moldy parts of cheese should be cut off.
|
|
|
|
| |
|
|
|
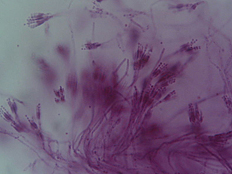
On the other hand, the blue in bleu cheese is a mold you can eat, and bleu cheese tastes great! Also, Alexander Fleming, a famous scientist, discovered in 1928 that a certain mold produces a chemical, called penicillin, that kills bacteria, leading to the discovery and use of antibiotics that medical doctors sometimes give us when we are sick. The photo on the left shows the mold that produces penicillin.
(from: http://en.wikipedia.org/wiki/File:Penicillium_Pengo.jpg) |
|
|
|
|
|
We have been taught to cover out mouths with a tissue, a hankerchief, or our sleeve when we cough or sneeze, to avoid spreading our germs around.
We did an experiment that shows the importance of washing our hands regularly, especially before we eat. We also learned that running an experiment is tricky, and each time we run one, we learn how we might do it better the next time. |
|
|
|
| |
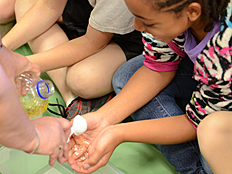
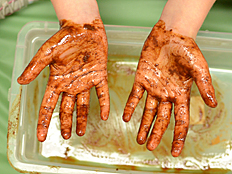
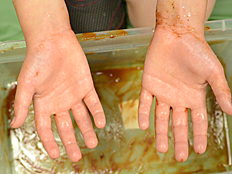
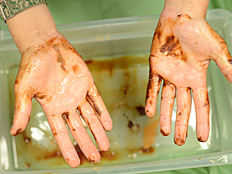
| In this experiment, we used six volunteers from the class. Each one spread one tablespoon of vegetable oil on their hands. Once their hands were coated and slippery, Ms. Walker sprinkled on teaspoon of cinnamon on each of their hands. |
|
|
|
|
|
|
|
| |
|
|
|
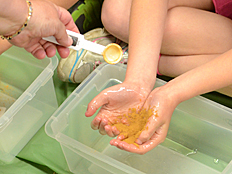
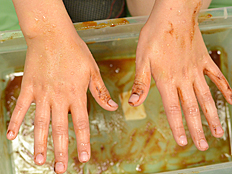
The volunteers rubbed their hands together until the cinnamon was uniformly spread out. The cinnamon represented bacteria or mold spores on our hands. Then, each of the students did something different, as shown and described below. Case 1 shows unwashed hands. Cases 2 - 6 show hands washed in different ways, as described.
|
|
|
|
| |
Case 1.
Unwashed Hands.
(Each student's hands began unwashed, as shown in the photos on the right.) |
|
|
|
|
|
|
|
| |
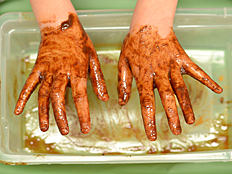
Case 2.
Cold Water
No Soap
15 Seconds |
|
|
|
|
|
|
|
| |
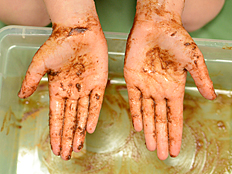
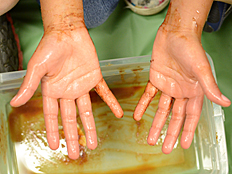
Case 3.
Cold Water
Soap
15 Seconds |
|
|
|
|
|
|
|
| |
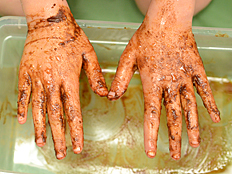
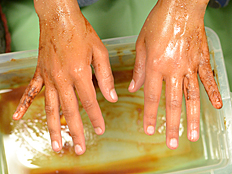
Case 4.
Warm Water
No Soap
15 Seconds |
|
|
|
|
|
|
|
| |
Case 5.
Warm Water
Soap
15 Seconds |
|
|
|
|
|
|
|
| |
Case 6.
Cold Water
Soap
5 Seconds
|
|
|
|
|
|
|
|
|
|
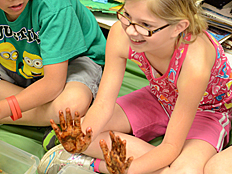
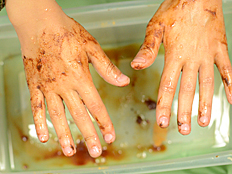
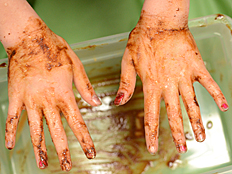
A number of things were not surprising. Washing removed much of the cinnamon (representing bacteria or molds). Washing for 15 seconds (the time it takes to sing the happy birthday song) in cold water with soap (Case 3) produced cleaner hands than those washed for only 5 seconds in cold water with soap (Case 6).
Washing in cold water with soap (Case 3) produced much cleaner hands than those washed in cold water without soap (Case 2), when both were done for 15 seconds.
Other things surprised us. We noticed that the hands of the student who washed in cold water with soap (Case 3) were cleaner than those washed in warm water with soap (Case 5). In looking back on our experiment, some of us noted that the warm water with soap student (Case 5) did not wash his hands as rigorously as the student who used cold water with soap (Case 3). We suggested that we would need to control that factor in future experiments.
We also noticed that we failed to clean certain parts of our hands as well as other parts. We found that not only were our palms cleaner than the other side, but also that our finger tips, outside fingers, and the areas between our fingers were not well cleaned. |
|
|
|
|
|
|
|
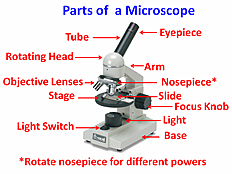
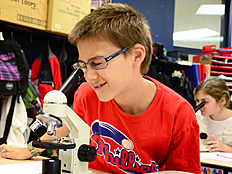
We knew that scientists, especially biologists, use microscopes to make very small things look bigger. So, Dr. DeLeo brought microscopes into our classroom for us to use in our next set of activities. |
|
|
|
| |
|
|
|
|
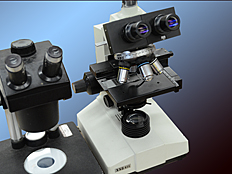
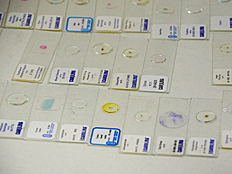
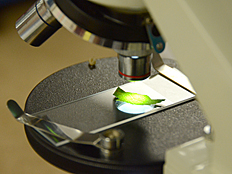
| The photo on the far left shows the type of microscope we used with the parts labeled. We began by looking at prepared slides. Prepared slides have dead organisms glued between two pieces of glass - a microscope slide and a cover slip. Some of these are shown just to the left. |
|
|
|
| |
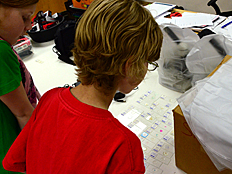
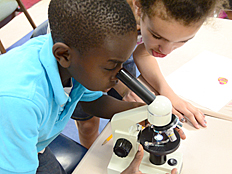
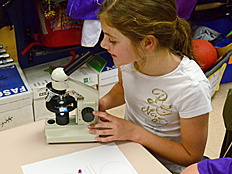
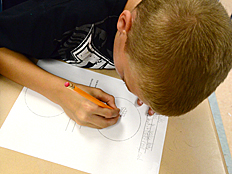
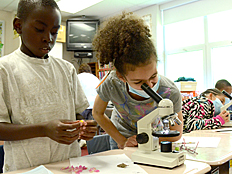
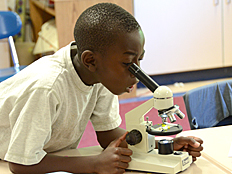
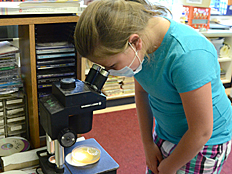
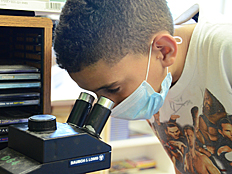
| Here are photos of us selecting our slides, examining them through the microscopes, and drawing what we saw. |
|
|
|
|
|
|
|
|
|
|
|
| |
|
|
|
|
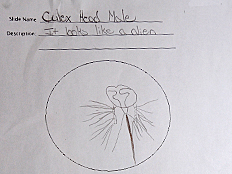
| Dr. DeLeo took photographs of some of the interesting specimens through our microscopes. On the far left is the head of a Culex, which is a type of mosquito. And, just to the left is one of our drawings. |
|
|
|
| |
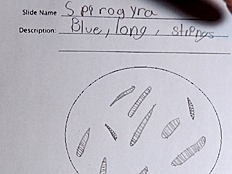
| Just to the right is a Spirogyra, which is a type of algae, often found in ponds. And, one of our drawings is shown on the far right. |
|
|
|
|
|
|
|
|
|
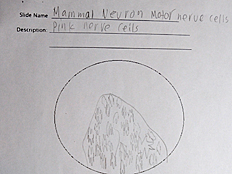
The photo below on the left shows nerve cells. Our drawing is shown in the middle. The photo on the right was taken at a greater magnification. |
|
|
|
|
|
| |
|
|
|
|
| The photo on the far left shows cells from the liver of an animal called an Amphiuma, which looks like an eel. Notice the cells and cell nuclei. Just to the left is an insect called a Ctenocephalides. It is about 2 millimeters long, so it can be seen without a microscope. |
|
|
|
| |
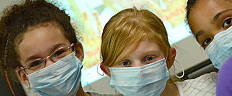
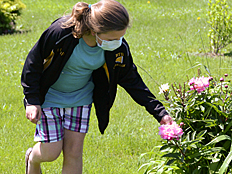
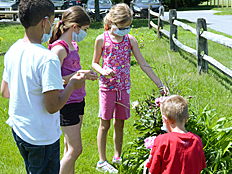
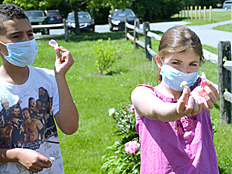
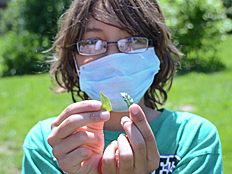
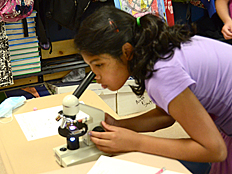
| Later, we gathered leaves and flowers to examine under our microscopes. Here are photos of us collecting samples and placing them under our microscopes. Since we had masks from another activity, we thought it would be fun to wear them while gathering our specimens. |
|
|
|
|
|
|
|
|
|
|
|
|
|
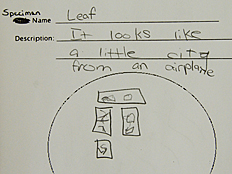
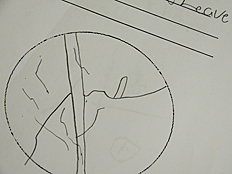
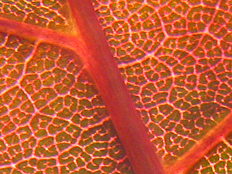
Below are drawing that we made of plant leaves. One of us said it looked like a city. The photo below on the right shows a leaf when it was changing color in the fall. It does look like the road map of a city! |
|
|
|
|
|
|
|
| |
|
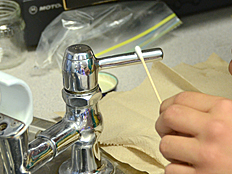
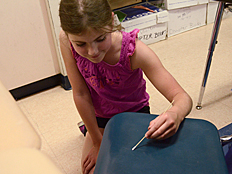
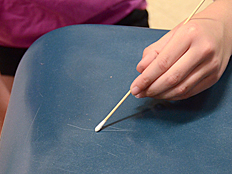
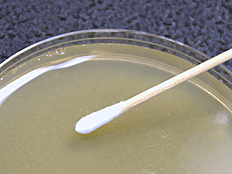
Our final experiment involved getting microorganisms to grow into colonies large enough for us to see. It was somewhat like our mold terrarium, however, this time we used something called agar in order to provide the nutrients for them to grow. In some cases, we gently rubbed our fingers on the agar. In other cases, we swabbed spots in the school using sterilized swabs, as shown on the right and below. We are grateful to Dr. Kuchka, a Professor of Biological Sciences at Lehigh University, for making the blank agar plates for us.
|
|
|
|
|
|
|
|
|
|
| |
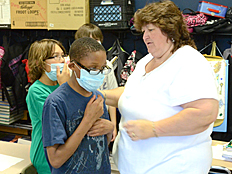
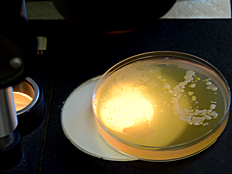
| After allowing several days for growth, we removed the lids so we could examine them more closely. As a precaution against mold allergies, and also because it was fun, Ms. Walker helped us place masks on our faces. First, we examined the growths visually, and then using a wide-field microscope. |
|
|
|
|
|
|
|
|
|
|
|
|
|
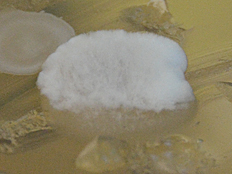
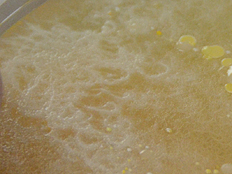
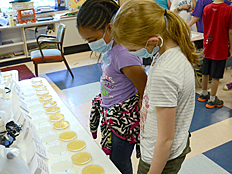
The agar plates started to show significant growth even after two days at room temperature. The photos below show the growth in our agar plates six days after we swabbed them. |
|
|
|
| |
|
|
|
|
1. Person A Hand Unwashed (left)
2. Person A Hand Washed in Cold Water, No Soap (middle) |
|
|
|
| |
3. Person B Hand Unwashed (middle)
4. Person B Hand Washed in Warm Water with Soap (right) |
|
|
|
|
|
|
|
| |
|
|
|
|
5. Person C Hand Unwashed (left)
6. Person C Hand Washed in Warm Water with Soap, then Sanitizer (middle) |
|
|
|
| |
7. Cough on Plate, then place drop of Sanitizer in Center (middle)
8. Hair (right) |
|
|
|
|
|
|
|
| |
|
|
|
|
9. Nose (Outside!) (left)
10. Book (middle) |
|
|
|
| |
11. Chair (middle)
12. Computer Mouse and Keyboard in Classroom (right) |
|
|
|
|
|
|
|
| |
|
|
|
|
13. Desk Top (left)
14. Floor Tile (middle) |
|
|
|
| |
15. Homework Folder (middle)
16. Pencil (right) |
|
|
|
|
|
|
|
| |
|
|
|
|
17. Light Switch in Classroom (left)
18. Money - Coins (middle) |
|
|
|
| |
19. Person D Hand Unwashed (middle)
20. Person D Hand Washed in Cold Water with Soap (right) |
|
|
|
|
|
|
|
| |
|
|
|
|
21. Door Handle in Classroom (left)
22. Bathroom Door Handle Inside and Outside (middle) |
|
|
|
| |
23. Water Fountain Faucet in Classroom (middle)
24. Bathroom Toilet Flush Handle (right).. |
|
|
|
|
|
|
|
|
|
| |
|
|
|
|
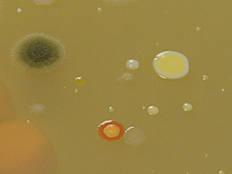
Dr. Kuchka said that the white fluffy growth was probably mold...
|
|
|
|
| |
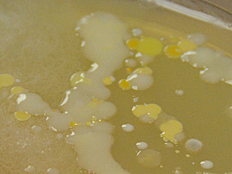
...and that the circular dots were probably bacteria.
|
|
|
|
|
|
|
|
|
|
|
|
Just like with the cinnamon experiment, some of our observations were expected, and some of them were surprising. We expected that washed hands would contain less mold and bacteria than unwashed hands. We didn't expect that the hand sanitizer would be so ineffective at cleaning our hands of bacteria and mold. However, the brand we used did not contain alcohol! We learned ways in which the experiment could be improved next time, and we discussed these in class.
We also learned that not all bacteria are bad. For example, the bacteria in our intestines help to process the food that we eat! |
|
|
|
|
|
| |
|
|
|
|
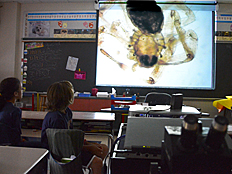
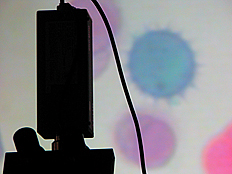
For our next activity, Dr. DeLeo brought a powerful microscope into our classroom that was connected to a television camera. He began the program by placing different things under the microscope and projecting the pictures on a screen.
|
|
|
|
|
|
|
|
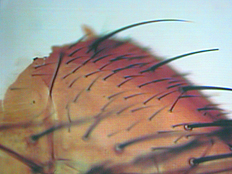
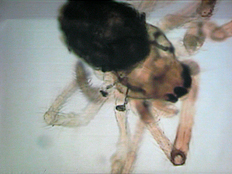
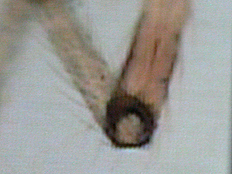
Dr. DeLeo placed a dead spider under the microscope so it would look real big. It was really scary looking. We are sure glad that real bugs are not that big! Notice the spiky insect hairs on the photo below on the left. The middle photo shows a spider. The right photo shows a close-up of a joint. |
|
|
|
|
|
|
|
|
|
Dr. DeLeo proceeded to place smaller and smaller things under the microscope. |
|
|
|
| |
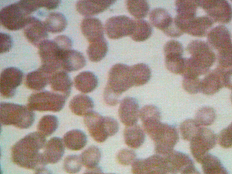
| The photo just to the right shows pollen grains. They are not really that color; they are dyed to make them easier to see. The photo on the far right shows human blood cells. We guessed that one! |
|
|
|
|
|
|
|
|
|
| |
|
|
|
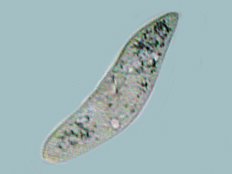
A single cell organism that can be found in pond water is called a paramecium. They are so small that you need a microscope to see them. Dr. DeLeo placed live paramecia under the microscope for us to see. They swim around in a drop of water by moving little hairs along the outside of their bodies. Just think of it - A human being has over 10,000,000,000,000 (ten trillion) cells, but a paramecium has just one! |
|
|
|
| |
| Check out the VIDEOS on the right by clicking the play buttons! The video on the far right shows a paramecium dying! |
|
|
|
|
|
|
|
|
|
|
|
We learned that each cell can make other cells. A cell does that by dividing into two cells, each the same as the original. That's how we get bigger, and how our body heals itself when we get hurt. Every cell in any plant or animal contains instructions for making that entire plant or animal. A cell on the tip of your nose contains the instructions for making your big toes. So, every time a cell divides into two cells, the dividing cell has to make two copies of these instructions, one for each of the new cells. The instructions are contained in what are called chromosomes. We call these instructions the "genetic code." |
|
|
|
|
|
| |
|
|
|
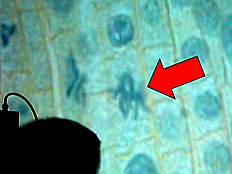
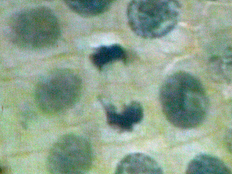
The picture on the left shows the cells in a plant. Plant cells are kind of boxy looking. The circles in the center of the cells are the cell nuclei, and they contain the chromosomes. Some of the cells in the picture are in the process of dividing into two cells. The red arrow points to a cell which is dividing into two cells, and the stringy things are the chromosomes going into both of the new cells! |
|
|
|
| |
|
We helped Dr. DeLeo find a really great cell! This one, shown on the right, has just about finished dividing, giving us two cells where before we had only one!
|
|
|
|
|
|
|
|
| |
|
|
|
|
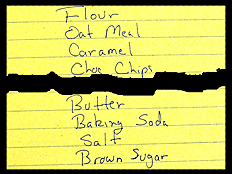
| But wait a minute! We seem to have a problem! Suppose we split a recipe for chocolate chip cookies in half. Would either of the two halves be a recipe for chocolate chip cookies? Of course not! In the same way, if our genetic code divides in half each time a cell divides, then this would be a big problem! |
|
|
|
|
|
Dr. DeLeo spoke to us about DNA and the genetic code. The genetic code uses four different chemicals. One ordering makes someone who has blue eyes, another brown eyes. One order makes a human being, another makes an artichoke.
DNA is called a "double helix," a "helix" because it twists like a spiral staircase, and "double" because it is a pair of helixes. The four chemicals have names, but they can be abbreviated by the first letters, A, T, C, and G. The two strands making up the double helix are side-by-side. If there is an "A" on the left, then there will always be a "T" on the right. So, "A" goes with "T" (A-T). Similarly, "C" goes with "G" (C-G). This pairing makes it possible for our cells to divide and make exact duplicates. When a cell is about to divide, the strands come apart, and each one picks up just the right partners to make two new, identical double helixes, one in each of the two cells. |
|
|
|
| |
|
|
|
When a cell divides, the genetic code - the recipe for us - has to be duplicated so there is one for each cell. As we saw, a recipe is no good if you just tear it into halves. Dr. DeLeo used something like hinged Legos to show us how one double helix in one cell becomes two identical ones in two cells. Here is an animated VIDEO of what Dr. DeLeo showed us. Just click the play button. |
|
|
|
|
|
|
|
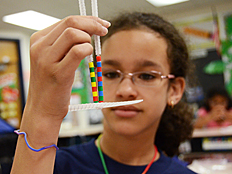
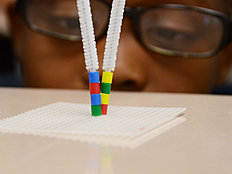
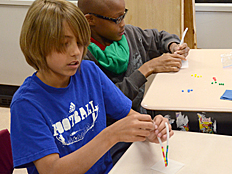
Dr. DeLeo helped us to understand all of this by giving us beads in fours colors, representing A, T, C, and G. We used a pipe cleaner to put together our make believe DNA. We can place any of the four colors in any order along one of the strands. However, where ever there is a blue bead on one side, we must have a yellow bead on the other. And, where ever there is a red bead on one side, we must have a green bead on the other. |
|
|
|
| |
|
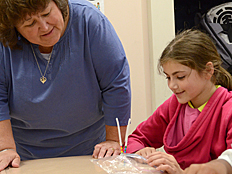
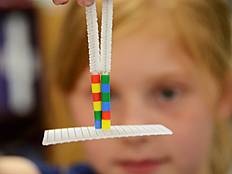
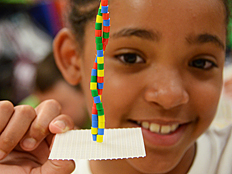
When we were done, we twisted the strands gently to give it the shape of a helix. We placed an extra twist at the top to hold in the beads, and then bent the sharp end of the pipe cleaner so we wouldn't get poked. Here are pictures of us putting together our DNA models.
|
|
|
|
|
|
|
|
|
|
|
|
Some of us made patterns like red-blue-red-blue... (of course with green-yellow-green-yellow... next to it). Since some of us made models with the same pattern, Dr. DeLeo asked us what we call people with the same genetic code. Many of us knew that the answer was identical twins! |
|
|
|
|
|
| |
|
|
|
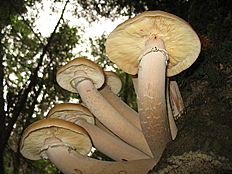
We are so glad that Ms. Walker and Dr. DeLeo created these programs for us. They even made mold and mushrooms exciting. We love science!
(http://en.wikipedia.org/wiki/File:Armillaria_ostoyae_MO.jpg) |
|
|
|
|
|
|
|
Dr. DeLeo told us when we started all of these programs that he is not a biological scientist. He studies physics and astronomy. Although he read enough about biology to work with Ms. Walker on this program, he also said that he received assistance from some very special friends: Ms. Karen Wilmore, a Middle School Teacher at Broughal Middle School, and Dr. Michael Kuchka, a Biological Scientist from Lehigh University.
Dr. DeLeo is very grateful to them for all of their help, and so are we! |
|
|
|
|
|
|
|
|
I hope you have enjoyed this web presentation as much as we enjoyed sharing the actual learning experience with your son or daughter. Although we have endeavored to exclude photographs where permission has been denied, it is possible for errors to occur. If you would like us to remove a photograph of your son or daughter for any reason, please send me an e-mail message at lgd0@lehigh.edu or call me at 610-758-3413, and we will remove it promptly. Please note that we will never associate a child's full or last name with a photograph except in circumstances where special permission was explicitly provided. Thank you. Gary DeLeo. |
|
|
|
|
|
|
|
|


aSm.jpg)
aSm.jpg)
aSm.jpg)
aSm.jpg)
aSm.jpg)
aSm.jpg)
Sm.jpg)
Sm.jpg)
Sm.jpg)
Sm.jpg)
Sm.jpg)
Sm.jpg)
Sm.jpg)
Sm.jpg)
Sm.jpg)
Sm.jpg)
Sm.jpg)
Sm.jpg)
Sm.jpg)
Sm.jpg)
Sm.jpg)
Sm.jpg)
Sm.jpg)
Sm.jpg)
Sm.jpg)
Sm.jpg)
Sm.jpg)
Sm.jpg)
Sm.jpg)
Sm.jpg)